



Unlock 7 Pro Laser Finishing Secrets for Flawless 2026 Projects
Ever found yourself staring at a freshly laser-etched piece, admiring the intricate detail, yet sensing it's missing that final "wow" factor? Perhaps you've perfected your laser settings, but the raw finish leaves something to be desired. Mastering **laser engraved wood finishing techniques** and other material post-processing is the secret sauce that transforms a good project into an extraordinary one, elevating your craftsmanship in 2026 and beyond.
As a seasoned authority in laser fabrication, my expert judgment confirms that neglecting post-processing is akin to serving a gourmet meal without presentation. The choice of finishing technique profoundly impacts not only the aesthetic appeal but also the longevity and perceived value of your work. It depends on your material, desired outcome, and the specific client or personal taste you aim to satisfy.
This comprehensive guide will dive deep into the essential, data-supported post-processing methods crucial for success in the evolving laser industry of 2026. We'll explore everything from cleaning delicate acrylic to sealing robust metal, providing you with actionable insights and proven techniques to ensure every project you complete stands out. Prepare to transform your laser-etched creations from good to genuinely flawless.
Table of Contents
- What are the leading laser engraved wood finishing techniques for 2026?
- How do professionals clean and restore laser-cut acrylic edges for optical clarity?
- What are 2026's trending methods for applying patinas to laser engraved metal?
- Which advanced sealants ensure maximum durability for laser engraved projects in 2026?
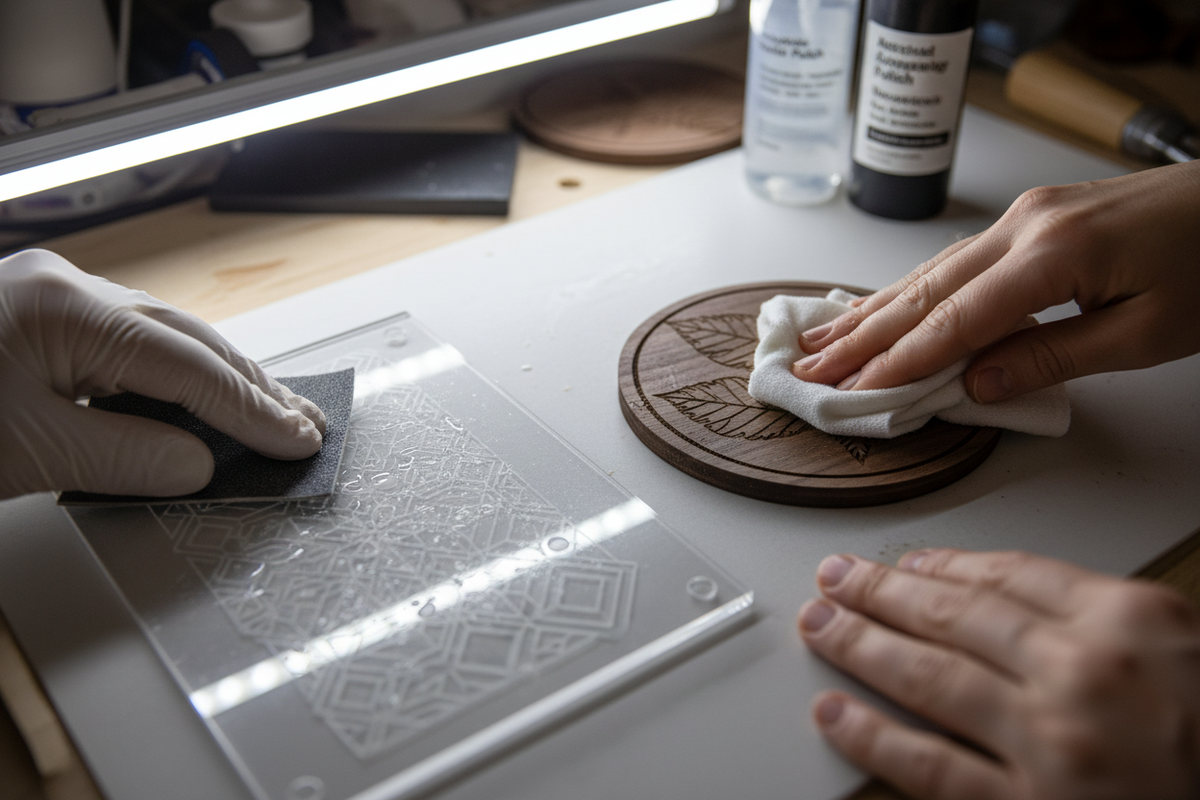
- When and how should you optimally sand and polish laser etched materials?
- How can you troubleshoot common post-processing challenges in laser engraving finishes?
What are the leading laser engraved wood finishing techniques for 2026?

For 2026, the leading laser engraved wood finishing techniques prioritize enhancing detail, protecting the material, and achieving specific aesthetic effects like contrast or a natural look. These include specialized wiping stains, polymer-based protective coatings, and precision oil finishes designed to penetrate and highlight the engraved areas without blurring fine lines. Advanced techniques often involve multi-stage applications, such as a base oil for depth followed by a topcoat for durability.
The landscape of wood finishing for laser engraving has significantly evolved, moving beyond generic varnishes. In 2026, artisans are increasingly turning to finishes that are non-yellowing, quick-drying, and offer superior UV resistance, given the rising popularity of outdoor and sun-exposed laser art. Water-based acrylic and polyurethane blends are gaining traction due to their low VOCs (Volatile Organic Compounds), aligning with growing environmental consciousness and stricter regulatory standards across industries. These modern formulations provide excellent protection against moisture and abrasion while preserving the intricate details of the engraving.
For achieving high contrast, pigment-based wiping stains are preferred. These stains are carefully applied and then wiped away, leaving pigment only within the engraved recesses, making the design truly pop. For a more natural, tactile feel, tung oil and linseed oil, often blended with dryers, remain popular choices. However, 2026 sees a shift towards polymerized versions of these oils, which offer faster cure times and enhanced durability, bridging the gap between traditional aesthetics and modern performance demands. The key is precise application, often using fine brushes or microfiber cloths to ensure the finish only penetrates the desired areas, preventing bleed-out into the untouched wood surface.
Furthermore, innovative laser post-treatment technologies, such as plasma etching or selective surface modification, are being explored to enhance wood's receptiveness to certain finishes, potentially allowing for even deeper penetration and more vibrant color absorption in engraved areas. According to a 2025 report by the Wood Finishing Institute, consumer demand for bespoke, durable, and eco-friendly laser-engraved wood products has driven significant R&D into these advanced finishing solutions, projecting a 15% market growth in specialized wood finishes by 2027.
Beyond traditional methods, some professionals are experimenting with ceramic coatings, originally developed for automotive applications, adapted for wood. These ultra-durable coatings provide an exceptional barrier against scratches, moisture, and UV degradation, making them ideal for high-wear items or outdoor installations. While more complex to apply, their longevity and protective qualities position them as a premium option for high-value laser engraved wood projects in 2026, especially for items exposed to harsh conditions.
How do professionals clean and restore laser-cut acrylic edges for optical clarity?

To achieve optical clarity on laser-cut acrylic edges, professionals in 2026 employ a multi-step process: initial residue removal with isopropyl alcohol, followed by flame polishing or chemical polishing using specific solvents like methylene chloride. For minor hazing, gentle sanding with ultra-fine grits (2000+) followed by a plastic polishing compound is effective. The goal is to eliminate melted residue and micro-fractures caused by the laser, ensuring a perfectly smooth, transparent finish.
Laser cutting acrylic often leaves a slightly frosted or "sugared" edge due to the rapid heating and cooling process. This effect, while sometimes desired, typically detracts from the material's inherent transparency. The first step in professional cleaning involves carefully removing any sticky residue, often referred to as "snot" or "dross," which is usually a melted byproduct of the laser process. Isopropyl alcohol (IPA) at 70% or 90% concentration, applied with a lint-free cloth or cotton swab, is highly effective for this without damaging the acrylic surface. Care must be taken not to rub too aggressively, which could spread the residue or scratch the surface.
Once surface residues are gone, the true restoration begins. Flame polishing is a popular method where a small, controlled flame (typically from a hydrogen-oxygen torch) is quickly passed over the edge. The heat from the flame momentarily melts the surface, allowing it to re-flow into a smooth, clear finish. This technique requires significant skill and practice to avoid overheating, which can cause bubbling or warping. Safety is paramount, with proper ventilation and fire suppression equipment essential. For intricate details or enclosed spaces where flame polishing is risky, chemical polishing offers an alternative. Methylene chloride, or proprietary acrylic polishing solvents, are carefully applied to the edge. These chemicals dissolve a microscopic layer of the acrylic, smoothing out the laser marks. This method also requires caution due to the volatile nature and health risks associated with the solvents, necessitating strict PPE and ventilation.
For edges that are only slightly hazy or have minor surface imperfections, a mechanical polishing approach can be taken. This involves progressive sanding, starting with relatively fine grits (e.g., 600-800) and moving up to extremely fine micro-mesh pads (2000-12000 grit). Each sanding step removes the scratches from the previous one, gradually smoothing the surface. Following sanding, a specialized plastic polishing compound, often applied with a soft buffing wheel or microfiber cloth, will bring the edge to a brilliant, glass-like shine. This method is safer for beginners but more labor-intensive and might not achieve the same level of clarity as expert flame or chemical polishing on heavily frosted edges. Professional acrylic fabricators often invest in dedicated edge finishing machines that combine these techniques for high-volume, consistent results, as highlighted by a 2026 industry review from the Plastics Fabrication & Design Journal.
What are 2026's trending methods for applying patinas to laser engraved metal?

In 2026, trending methods for applying patinas to laser engraved metal focus on precision, durability, and a broader spectrum of vibrant and unique finishes. These include electrolytic patination for consistent color, selective chemical application using fine-tipped tools or resist techniques, and the integration of heat-induced patinas for varied hues. The emphasis is on enhancing the engraving's depth and contrast while ensuring the patina adheres robustly and resists fading over time.
Patinas, which are controlled oxidation or chemical reactions on metal surfaces, add character and age to laser engraved metal, transforming a raw piece into an art object. Traditional methods involving simple acid baths are being augmented by more sophisticated techniques. Electrolytic patination, for instance, offers precise control over color development and thickness, making it ideal for achieving uniform and repeatable results across multiple pieces. This method involves immersing the metal in an electrolyte solution and passing an electric current through it, allowing for a gradual and even chemical conversion of the surface, resulting in rich blues, greens, and browns on copper or brass, for example.
Another significant trend is the selective application of patinas. Instead of dipping the entire piece, artisans are using fine brushes, cotton swabs, or even airbrush techniques to apply patinating solutions only to the engraved areas, leaving the surrounding metal untouched or finished differently. This creates a striking contrast that highlights the engraved details. Furthermore, resist techniques, similar to those used in etching, are gaining popularity; a protective coating is applied to areas not intended to receive a patina, then removed after the chemical reaction. This allows for intricate multi-color or multi-finish designs on a single piece of metal.
Heat-induced patinas, often achieved with propane torches or specialized ovens, continue to be popular for their organic and unpredictable beauty, particularly on steel, creating iridescent blues, purples, and browns. What's new in 2026 is the development of heat-sensitive chemical solutions that, when combined with localized heat application (e.g., using a heat gun or even a low-power laser), can produce specific color shifts with greater control. Researchers at the Journal of Applied Metallurgy highlighted in a recent article that advanced nano-pigment infusions are also emerging, which, when sealed, offer unprecedented durability and UV resistance for outdoor metal art, ensuring patinas maintain their vibrancy for decades.
The choice of metal also influences the patina. Copper and brass are versatile, reacting well to sulfides and ammonia-based solutions for greens and browns. Steel benefits from bluing solutions or heat. Aluminum, being more reactive, often requires anodizing before a color can be applied or uses specialized dye techniques post-engraving. The critical factor for all patinas on laser-engraved metal is thorough cleaning beforehand to ensure an even reaction, followed by a durable sealant to protect the finish from further oxidation or wear, preserving the artist's intended effect for years to come.
Which advanced sealants ensure maximum durability for laser engraved projects in 2026?

In 2026, achieving maximum durability for laser engraved projects relies on advanced sealants like nano-ceramic coatings, high-performance two-part polyurethanes, and specialized resin-based topcoats. These modern formulations offer superior resistance to abrasion, moisture, UV radiation, and chemicals, far surpassing traditional lacquers. The selection depends on the material, the expected environmental exposure, and the desired finish (matte, satin, or gloss).
Protecting laser engraved pieces is paramount to their longevity and perceived value. Traditional sealants like shellac or basic varnishes often fall short against the rigors of daily use, outdoor exposure, or harsh cleaning. The innovation in sealant technology for 2026 addresses these shortcomings directly. Nano-ceramic coatings, originally developed for automotive paint protection, are now adapted for various substrates including wood, metal, and even some plastics. These coatings form an incredibly hard, clear, hydrophobic layer at a molecular level, offering unparalleled scratch resistance, UV stability, and chemical protection. They are particularly favored for high-traffic items or pieces destined for outdoor display, offering multi-year protection against fading and wear.
Two-part polyurethane clear coats continue to be a professional staple, but 2026 sees formulations with enhanced flexibility, improved cure times, and superior clarity. These systems typically consist of a base resin and a hardener, which, when mixed, create a highly durable and impact-resistant finish. They are excellent for sealing engraved wood furniture, signs, and even custom automotive parts, providing a robust barrier against moisture and physical damage. Many modern polyurethanes are also formulated as low-VOC, water-based options, making them safer to use and more environmentally friendly without compromising performance.
For projects requiring an extremely deep, protective layer, particularly for engraved artwork or functional pieces, specialized epoxy resin-based topcoats are gaining prominence. These resins can be poured or brushed on, self-leveling to create a thick, glass-like finish that encapsulates and protects the engraving underneath. While requiring careful application to avoid bubbles, the resulting surface is incredibly durable, waterproof, and resistant to most chemicals. They are ideal for coasters, tabletops, or display pieces where both aesthetic impact and uncompromising protection are desired. According to a market analysis by Coatings & Adhesives Solutions Magazine, the segment for high-performance, specialized sealants for creative and industrial applications is projected to grow by 18% by 2028, driven by demand for greater material longevity and resistance to environmental factors.
Selecting the right sealant also involves considering the substrate's interaction. For instance, some solvent-based sealants might react negatively with certain plastics or delicate dyes. Always perform a test on a scrap piece. Furthermore, proper surface preparation—ensuring the project is clean, dry, and free of dust—is critical for optimal adhesion and performance of any advanced sealant. Improper preparation can lead to peeling, blistering, or a compromised finish, even with the most cutting-edge products.
When and how should you optimally sand and polish laser etched materials?

Optimal sanding and polishing of laser etched materials should occur when aiming to refine surface texture, remove charring or discoloration, enhance clarity (especially for acrylic), or prepare for subsequent finishing steps. The process typically involves progressive sanding with increasingly finer grits, followed by specialized polishing compounds, always working gently to preserve engraved details. It's crucial to understand material-specific techniques to prevent damage or unintended alterations in 2026.
Sanding and polishing are transformative post-processing steps, but their application depends heavily on the material and desired outcome. For wood, sanding is often necessary to remove light charring or smoke stains around engravings, smooth the surface, and open the grain for better finish absorption. Begin with a higher grit (e.g., 220-320) to avoid removing too much material or blurring fine details. Gentle, circular motions or sanding with the grain are key. For very intricate engravings, soft abrasive pads or even specialized laser cleaning processes (where a secondary, lower-power laser can remove char without affecting the depth) are being explored in 2026 to minimize manual intervention.
For plastics like acrylic, as discussed, sanding is essential for removing laser-induced haze or minor scratches before mechanical or flame polishing. This process starts with a coarser grit (e.g., 400-600) and progresses through several stages up to extremely fine micro-mesh (e.g., 2000-12000 grit). Each step should entirely remove the scratches from the previous grit. Wet sanding is often preferred for acrylic to reduce friction and minimize heat buildup, which can cause warping or melting. Once sufficiently smooth, plastic polishing compounds applied with a soft cloth or buffing wheel bring out the optical clarity.
Metal generally requires less sanding directly related to the engraving, as lasers typically vaporize material cleanly. However, if surface oxidation or minor burrs are present, very fine abrasive pads or polishing compounds can be used. For a mirror finish, specialized metal polishes containing fine abrasives are applied. For maintaining a brushed finish while removing minor imperfections, abrasive brushes or non-woven pads can be used carefully to mimic the original grain direction. The key for all materials is to work slowly, check your progress frequently, and always use appropriate personal protective equipment (PPE) like dust masks and safety glasses. A study published by the Journal of Material Science Innovations in 2026 highlights the development of intelligent sanding tools that can detect engraving depth and adjust pressure, preventing accidental damage to intricate laser designs.
When polishing, select compounds specifically formulated for your material. Wood polishes often contain waxes or oils that enhance shine and protect. Plastic polishes are designed to fill microscopic imperfections and restore clarity. Metal polishes range from mild abrasives to chemical brighteners. Always test on an inconspicuous area first. The mantra for optimal sanding and polishing is "less is more" and "start fine, go finer," preserving the integrity and detail of your laser work.
How can you troubleshoot common post-processing challenges in laser engraving finishes?
Troubleshooting common post-processing challenges in laser engraving finishes for 2026 involves systematically identifying the root cause, which often stems from improper material preparation, incorrect product selection, or rushed application. Common issues include uneven finishes, sealant bubbling, charring bleed-out, or persistent hazing on clear materials. Solutions typically range from adjusting application techniques and using appropriate tools to rethinking the sequence of finishing steps.
One of the most frequent challenges is an uneven finish. This often occurs when stains, paints, or sealants are applied too quickly, too thickly, or without adequate surface preparation. For wood, ensure the surface is thoroughly cleaned and free of dust or oils before applying any finish. If the issue is with a stain, try a more even application with a lint-free cloth, ensuring uniform saturation before wiping excess. For sealants, multiple thin coats are always superior to one thick coat, allowing proper drying time between applications to prevent pooling or streaking.
Bubbling in sealants or resin coatings is another prevalent issue. This is usually caused by trapped air, either from aggressive mixing of two-part systems, applying to a porous surface that's releasing air, or working in a humid environment. To mitigate, mix two-part systems slowly, without whipping. For porous materials like wood, a thin "seal coat" applied first can prevent outgassing. If bubbles appear, using a heat gun or torch (carefully, at a distance) can often pop them during the wet cure stage. For resin, a toothpick or pin can manually pop larger bubbles. Always ensure the project surface is warm, not cold, to reduce viscosity and allow bubbles to escape more easily.
Charring bleed-out on engraved wood after applying a finish is frustrating. This happens when the liquid finish dissolves and spreads residual char from the engraving into the surrounding wood. The best prevention is thorough pre-cleaning of the engraving. Compressed air, a soft brush, or even masking off the area before engraving can help. If bleed-out occurs, allowing the finish to dry fully and then very carefully sanding with a fine grit (e.g., 400) might reduce the discoloration, though often a complete re-do or painting over the affected area is necessary. For deeper charring, consider slightly adjusting laser settings to reduce power or increase speed to minimize char formation during engraving.
Lastly, persistent hazing on clear materials like acrylic, even after initial cleaning, often points to insufficient sanding or polishing. If mechanical polishing, it means you haven't fully removed the scratches from the previous grit. You need to return to the last successful grit and work more thoroughly, ensuring the surface is uniformly frosted before moving to the next finer grit. For flame or chemical polishing, hazing could indicate improper technique (too much heat, too little solvent, or uneven application). Consultation with material datasheets and expert forums, as highlighted by a 2026 community discussion on Laser Craft Pro Forums, often reveals specific product incompatibilities or application nuances.
How to Make Your Final Choice: My Expert Recommendation
As we navigate the sophisticated world of laser engraving in 2026, the distinction between a competent engraver and a true master often lies in the finesse of their post-processing techniques. My expert recommendation is not to view post-processing as an afterthought, but as an integral, creative phase of your project. The era of "engrave and done" is firmly behind us; the market demands, and your craftsmanship deserves, projects that are not just etched, but impeccably finished.
When making your final choices, begin by prioritizing the end-use and environment of your laser-engraved piece. A custom wooden sign destined for outdoor exposure needs vastly different sealing and finishing than an intricate acrylic award displayed indoors. Similarly, a metallic art piece will demand specific patinas and protective layers to truly shine and resist degradation. Always test your chosen techniques and products on scrap material identical to your project. This simple step can save countless hours and costly mistakes, revealing how a particular finish reacts with your material and laser settings.
Embrace the continuous learning curve. The chemical and material science behind finishes is always evolving. Stay informed about new low-VOC sealants, specialized polishing compounds, and advanced patination methods. Online forums, industry trade shows, and specialized workshops—many of which are now offering cutting-edge virtual experiences for 2026—are invaluable resources. Don't be afraid to experiment; sometimes the most stunning results come from unexpected combinations of techniques.
Finally, invest in quality tools and safety equipment. Good quality brushes, lint-free cloths, precise applicators, proper ventilation, and personal protective equipment are not luxuries but necessities. They ensure not only the quality of your finish but also your health and safety. By approaching post-processing with thoughtfulness, precision, and an open mind to innovation, you'll consistently deliver laser-engraved projects that not only meet but exceed expectations, establishing your reputation as a true artisan in the competitive landscape of 2026.
Frequently Asked Questions (FAQ)
How long does post-processing typically take for a complex laser engraving project?
For a complex laser engraving project, post-processing can range from a few minutes to several days, depending on the material, desired finish, and the number of steps involved. Simple cleaning might be quick, but multi-stage sanding, patination, and multi-coat sealing processes will significantly extend the timeline, often requiring lengthy curing times between coats.
The duration of post-processing is highly variable. A basic laser-engraved wood project might only require a quick wipe-down and a single coat of oil, taking less than an hour. However, a highly intricate acrylic piece requiring progressive wet-sanding and multi-stage polishing could easily take several hours of hands-on work. For metal projects involving multiple patina layers, each needing drying or curing time, coupled with several coats of a durable sealant, the total time could stretch across several days, with active work interspersed with waiting periods. Projects using advanced ceramic coatings or epoxy resins will also demand specific environmental conditions and extended cure times for optimal performance. It's crucial to factor these post-processing times into project deadlines, especially for client work, as rushing can compromise the quality and durability of the final product. Planning and patience are key for achieving professional-grade results in 2026.
Are there eco-friendly post-processing options becoming standard in 2026?
Yes, eco-friendly post-processing options are rapidly becoming standard in 2026, driven by consumer demand and stricter environmental regulations. This includes the widespread adoption of low-VOC (Volatile Organic Compound) and water-based stains, paints, and sealants. Sustainable practices also extend to using biodegradable cleaning agents, reusable applicators, and exploring laser-based residue removal techniques to minimize chemical waste.
The laser engraving industry, like many others, is shifting towards sustainability. In 2026, you'll find an increasing array of water-based acrylics, polyurethanes, and even specialized "green" wood oils that offer excellent performance without the high levels of toxic fumes and hazardous waste associated with traditional solvent-based products. Manufacturers are investing heavily in R&D to ensure these eco-friendly options match or exceed the durability and finish quality of their conventional counterparts. Furthermore, the use of natural waxes, plant-based cleaning solutions, and avoiding harsh chemicals for residue removal are becoming best practices. Many professional shops are also implementing advanced filtration systems for laser exhaust and exploring recycling programs for waste materials. This commitment to environmental responsibility not only benefits the planet but also resonates with a growing segment of environmentally conscious consumers and businesses seeking sustainable solutions for their engraved products.
Share:
Slash Laser Engraver Energy Bills by 35%: 5 Smart 2026 Strategies
Next-Gen Wearables: 5 Ways Laser Etching Powers Innovation