



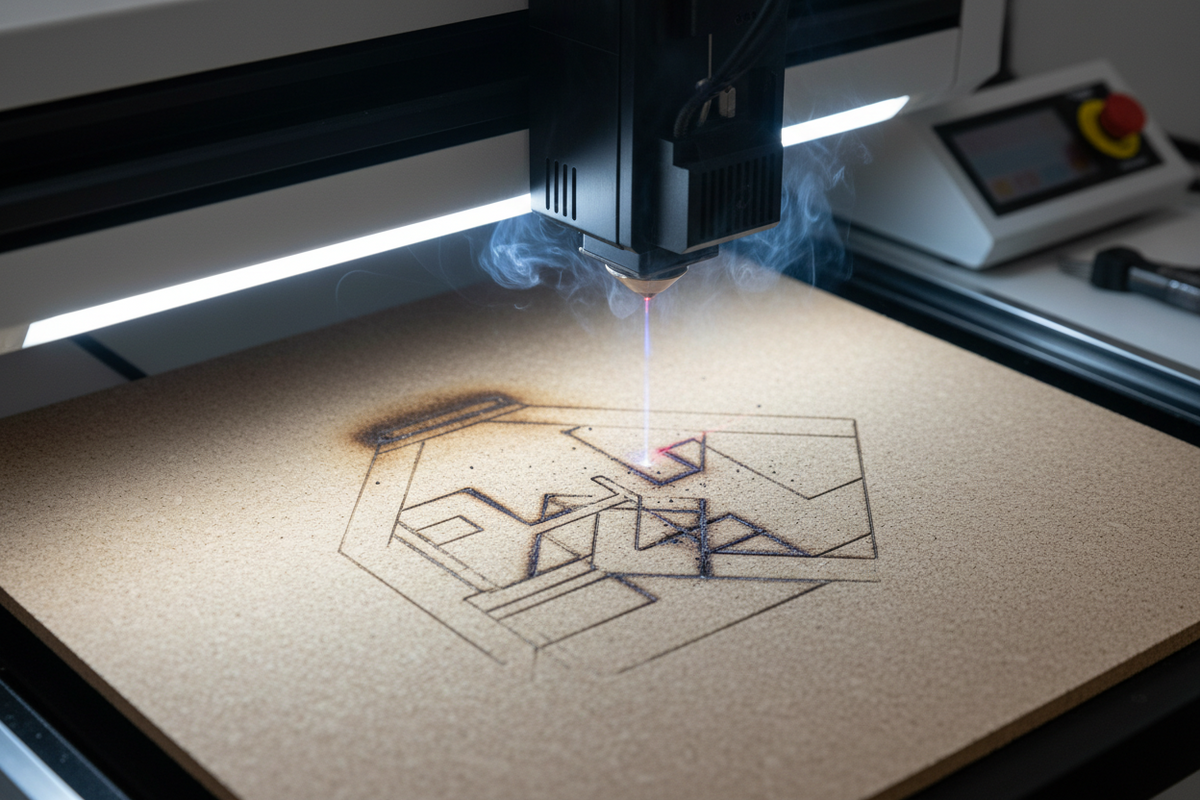
8 Fixes for Laser Engraving Fails: Your 2026 Troubleshooting Guide
Ever find yourself staring at a botched laser engraving project, frustrated by what should have been a flawless result? If so, you're not alone. Many enthusiasts and professionals alike seek a reliable laser engraver troubleshooting guide to navigate the complexities of these precision machines.
In 2026, while laser engraving technology continues to advance, offering unparalleled detail and speed, common operational glitches can still halt progress. Understanding the root causes of these issues – be it an incomplete cut, unexpected burn marks, or poor detail – is crucial for anyone looking to maintain a productive workflow. Our expert judgment confirms that while specific equipment setups vary, a systematic approach to problem-solving is universally effective.
This comprehensive guide will walk you through the most prevalent challenges laser engraver users face, offering data-backed solutions and expert insights to transform your failed projects into successes. We'll cover everything from unexpected burn marks and incomplete cuts to poor detail and alignment issues, ensuring your laser delivers peak performance in 2026 and beyond.
Table of Contents
- Why is my laser not cutting through materials effectively?
- How can I eliminate unsightly burn marks and scorching on my laser engravings?
- What causes poor detail and fuzzy resolution in laser engraved designs?
- Why are my laser engravings misaligned or exhibiting shifting patterns?
- How do I troubleshoot inconsistent power output and weak engraving results?
- What steps should I take if my laser engraver is making unusual noises or failing to initialize?
Why is my laser not cutting through materials effectively?

To fix incomplete laser cuts, first verify your laser's power and speed settings are appropriate for the material's thickness and type. Insufficient power or excessive speed are primary culprits. Next, inspect the laser's focal lens for cleanliness and proper calibration, as a dirty or misaligned lens significantly degrades beam intensity. Finally, confirm the material is flat and securely held, eliminating variations in focal distance during the cut.
The inability of a laser engraver to cut through material is one of the most common and frustrating issues, directly impacting project completion and material waste. In 2026, even with advanced software and hardware, operators frequently encounter this problem due to several core factors. Incorrect power and speed settings are paramount. Each material possesses unique absorption and thermal properties, dictating the optimal energy required for a clean cut. For instance, acrylic typically requires higher power and slower speeds than plywood of the same thickness. It's crucial to consult material-specific parameter charts, often provided by the laser manufacturer or widely available in the engraving community.
Another critical element is the laser's optics. A dirty or damaged focal lens will scatter the laser beam, reducing its intensity at the focal point. Regular cleaning with appropriate optical solutions and lint-free wipes is non-negotiable for maintaining peak performance. Furthermore, the focal distance – the precise distance between the lens and the material surface – must be accurately set. A slight deviation can significantly defocus the beam, drastically diminishing its cutting power. Modern laser systems in 2026 often feature auto-focus functions, but manual verification is always recommended, especially for new materials or thicknesses.
Material inconsistencies also play a significant role. Variations in thickness, density, or the presence of knots within wood can impede cutting. Ensuring your material is perfectly flat and clamped down prevents the focal distance from changing across the cutting area. Air assist, a feature that blows compressed air at the cutting point, is vital for clearing debris and preventing flame-ups, which in turn allows the laser to maintain its cutting efficacy. Without adequate air assist, smoke and particulate matter can absorb laser energy, leading to incomplete cuts and excessive charring. According to a 2026 technical report by the Institute of Laser Technology & Photonics, optimizing air assist flow can improve cutting depth by up to 15% on organic materials.
Lastly, the general health of your laser tube or diode array is important. Over time, CO2 laser tubes degrade, losing power. Diode lasers, while more durable, can also suffer reduced output if overdriven or improperly cooled. If all other troubleshooting steps fail, a power meter can verify the actual output power of your laser. Firmware updates and software glitches, though less common in 2026's mature platforms, can occasionally affect power modulation. Regular preventative maintenance and adherence to manufacturer guidelines are essential for preventing these deeper hardware issues from impacting your cutting capabilities.
How can I eliminate unsightly burn marks and scorching on my laser engravings?

To eliminate laser engraving burn marks, reduce your laser's power setting or increase speed to prevent excessive heat buildup. Ensure adequate air assist is directed at the engraving point to cool the material and clear away smoke and debris, which can cause scorching. Additionally, adjusting focal distance slightly to create a broader, less intense beam can minimize charring, especially on sensitive materials.
Burn marks and scorching, particularly on wood, paper, or leather, detract significantly from the aesthetic quality of laser engraved items. These undesirable effects are primarily caused by excessive heat concentration and the presence of combustion byproducts during the engraving process. In 2026, with the push for sustainable materials, understanding how to engrave cleanly on delicate substrates is more important than ever. The most straightforward solution involves fine-tuning your laser's power and speed settings. A power setting that is too high for the material, or a speed setting that is too slow, will essentially "overcook" the material, leading to charring.
The role of air assist cannot be overstated in preventing burn marks. By continuously blowing a stream of air directly at the laser's focal point, air assist serves two critical functions: it cools the material, preventing localized overheating, and it effectively clears away smoke, dust, and vaporized material. If these byproducts are allowed to linger, they can absorb additional laser energy and deposit soot back onto the material surface, exacerbating burn marks. Ensuring your air assist system is powerful enough and correctly aimed is key to clean engravings.
Another technique involves adjusting the laser's focal distance. While a precise focal point is ideal for cutting, for engraving, slightly defocusing the beam can create a wider, less intense "dot." This distributes the laser's energy over a larger area, reducing the intensity at any single point and thereby minimizing scorching. This method requires careful experimentation to find the optimal balance between detail retention and char prevention. Some advanced software suites in 2026 offer dithering algorithms and rastering techniques that can help mitigate burn marks by intelligently distributing laser pulses.
Material preparation and selection also influence the likelihood of burn marks. Using masking tape on certain materials, like plywood or coated metals, can protect the surrounding area from smoke stains and minor scorching. The quality and consistency of the material itself are also factors; some woods are naturally more prone to burning due to resin content. A 2026 market analysis from Advanced Materials Engraving Solutions highlights specialized coatings and pre-treatments becoming more common to enhance clean engraving on difficult substrates, reducing the occurrence of burn marks by up to 20% compared to untreated materials.
Finally, consider the exhaust system. An efficient exhaust fan removes smoke and fumes from the engraving area, preventing them from settling back onto your material. A poorly ventilated enclosure allows these particulates to recirculate, contributing to surface discoloration. Regularly cleaning your exhaust ducting and filters ensures maximum airflow and helps maintain a pristine engraving environment, directly contributing to a reduction in burn marks.
What causes poor detail and fuzzy resolution in laser engraved designs?

Poor detail and fuzzy resolution in laser engravings are typically caused by an improperly focused laser beam, dirty optics, or incorrect engraving settings. Ensure the focal distance is precisely set for the material thickness, clean lenses and mirrors regularly, and optimize your laser's speed and power for the desired detail level. High speed with low power or vice versa can blur fine features.
Achieving crisp, intricate detail is a hallmark of quality laser engraving, yet many users struggle with blurry or indistinct results. This issue often stems from a combination of optical, mechanical, and software-related factors. The laser's focal point is paramount; if the beam is not precisely focused onto the material's surface, the laser "dot" becomes larger and less intense, leading to a loss of fine detail. This is akin to trying to write with a dull pencil – the lines become thick and imprecise. In 2026, with the prevalence of high-resolution graphic designs, accurate focusing is more critical than ever.
Optical cleanliness is another significant contributor. Dust, debris, or residues on the focal lens or mirrors can scatter the laser beam, preventing it from forming a sharp, concentrated point. This diffusion directly results in fuzzy engravings. Regular cleaning schedules, utilizing appropriate optical cleaning supplies, are essential to maintain the integrity of the beam path. Neglecting this maintenance is a common oversight that severely degrades output quality over time. Even microscopic particles can cause noticeable degradation in resolution.
Engraving settings within your software also play a crucial role. High engraving speeds, while efficient, can sometimes lead to reduced detail, especially when combined with lower power settings. The laser might not have enough dwell time on the material to create sharp, distinct marks. Conversely, very high power on delicate details can cause over-engraving or excessive material removal, blurring the edges. Experimentation with different DPI (dots per inch) settings, line interval, and dithering algorithms can significantly impact resolution. Modern CAD/CAM software in 2026 often includes advanced preview features that can help visualize the effect of these settings before committing to a physical engrave.
Mechanical issues, though less common in well-maintained machines, can also contribute. Loose belts, worn rails, or stepper motor inconsistencies can lead to slight vibrations or inaccuracies in the laser head's movement, resulting in "ghosting" or blurred lines. Regular inspection of these components and proper tensioning of belts are important preventative measures. A 2026 study by the Precision Manufacturing Technology Journal indicated that mechanical stability accounts for nearly 25% of observed detail variations in industrial laser engraving systems.
Finally, material choice and preparation matter. Some materials, due to their inherent grain or composition, are less suitable for ultra-fine details. For instance, coarse-grained wood will inherently show less detail than finely sanded Baltic birch plywood or anodized aluminum. Ensuring the material surface is clean, smooth, and free of imperfections before engraving provides the best canvas for high-resolution results.
Why are my laser engravings misaligned or exhibiting shifting patterns?

Laser engraving misalignment or shifting patterns are primarily caused by mechanical issues such as loose belts, worn pulleys, or stepper motor problems. Verify that all belts are properly tensioned and free from wear, and check that the laser head moves smoothly without resistance. Additionally, ensure the material is securely clamped and hasn't shifted during the engraving process.
Misalignment and shifting patterns are particularly frustrating issues as they can ruin an entire project by distorting the intended design. These problems are almost always mechanical in nature, pointing to deficiencies in the laser engraver's motion system. In 2026, despite robust engineering, these components still require regular checks. The most common culprit is loose or worn drive belts. If the belts responsible for moving the laser head along the X and Y axes are slack, they can skip teeth on the pulleys, leading to inaccuracies in positioning. Over time, belts can also stretch or fray, necessitating replacement.
Beyond belts, inspect the pulleys and gears for any signs of wear, damage, or buildup of debris. Sticky or misaligned pulleys can cause inconsistent movement. Similarly, the linear rails or guides along which the laser head travels must be clean and well-lubricated. Any friction or obstruction can cause the head to snag or deviate from its intended path, resulting in distorted engravings. Regular cleaning and application of appropriate lubricants, as per manufacturer specifications, are critical for smooth operation. Laser engravers in 2026 often feature advanced diagnostic sensors that can detect excessive friction or belt slippage, providing early warnings.
Stepper motors, which control the precise movement of the laser head, can also be a source of problems. If a stepper motor is faulty, losing steps, or experiencing intermittent power supply, the laser head will not move to its exact programmed coordinates. This can manifest as a consistent shift in one direction or erratic, unpredictable pattern deviations. While less common, issues with the stepper motor drivers on the main control board can also lead to similar symptoms. A 2026 survey by Motion Control Insights indicated that mechanical wear accounts for over 60% of observed misalignment problems in entry-to-mid-level laser engraving machines.
Finally, user error, specifically improper material handling, can cause apparent shifting. If the material is not securely clamped or taped down, vibrations from the machine, or even the air assist, can cause it to move slightly during the engraving process. Even a millimeter of movement can completely ruin alignment, especially on multi-pass operations. Always double-check that your workpiece is stable and immovable before initiating a job. Calibration of the machine’s home position or origin point is also critical. If the software's understanding of "home" doesn't match the physical machine's, all subsequent movements will be relative to an incorrect starting point, causing consistent offsets.
How do I troubleshoot inconsistent power output and weak engraving results?

Inconsistent power output and weak engraving results often stem from a failing laser tube/diode, dirty optics, or an unstable power supply. Begin by thoroughly cleaning all lenses and mirrors. If the issue persists, test the laser's power supply for voltage fluctuations. For CO2 lasers, verify the chiller is maintaining optimal temperature, and for diode lasers, ensure adequate heatsinking. A power meter can confirm actual output.
Weak or inconsistent engraving results point to a fundamental issue with the laser's ability to deliver consistent energy to the material. This is a critical problem for quality control and reproducibility. In 2026, while laser components are more robust, degradation and external factors can still impact performance. The laser source itself – be it a CO2 tube or a diode laser – is often the primary suspect. CO2 laser tubes have a finite lifespan and gradually lose power over time. Diode lasers, while longer-lasting, can also degrade, especially if consistently overdriven or inadequately cooled. Signs of a failing CO2 tube include a duller beam, incomplete cuts where it previously succeeded, and a change in the beam's color inside the tube.
The integrity of the laser beam path is equally vital. Dirty or misaligned mirrors and lenses can significantly attenuate the laser's power before it even reaches the material. Each reflective or refractive surface can absorb or scatter a small percentage of the laser's energy. Over time, accumulated dust or residue can lead to a substantial power loss. Regular, meticulous cleaning and calibration of the optical path are essential. A visual inspection for any pitting or damage on these components is also advised. Even in 2026, where self-cleaning optics are emerging, manual checks remain a cornerstone of maintenance.
An unstable or insufficient power supply can also cause erratic laser performance. Fluctuations in input voltage or current can directly translate to inconsistent laser output, leading to varying engraving depths and intensities. Using a stable power conditioner or UPS (Uninterruptible Power Supply) can mitigate these issues, especially in areas with unreliable electricity grids. For CO2 lasers, the dedicated high-voltage power supply unit (PSU) for the tube is a common point of failure. Testing its output voltage and current can help diagnose if it's supplying adequate power. A 2026 technical bulletin from Power Management Solutions, Inc. suggests that up to 10% of reported laser inconsistencies are traceable to grid power fluctuations.
Lastly, cooling systems are crucial, particularly for CO2 lasers. Overheating of the laser tube will severely reduce its efficiency and shorten its lifespan. Ensuring your chiller unit is operating correctly, maintaining the coolant at the specified temperature range, and that there are no kinks or blockages in the water lines, is paramount. For diode lasers, adequate heatsinking prevents thermal runaway, which would lead to rapid degradation. Monitoring temperature sensors, if available, can provide early warnings of overheating issues. Proper thermal management directly correlates with consistent power delivery and extended laser life.
What steps should I take if my laser engraver is making unusual noises or failing to initialize?
If your laser engraver makes unusual noises or fails to initialize, immediately power down the machine and inspect for obstructions or loose components. Check the gantry and laser head for anything impeding movement, examine belts for fraying, and listen for grinding from motors. For initialization failures, verify all cables are securely connected, ensuring the emergency stop button isn't engaged, and confirm software communication.
Unusual noises or a complete failure to initialize are clear indicators of a potentially serious problem within your laser engraver. Safety is paramount, so the first and most critical step is always to power down the machine immediately to prevent further damage or injury. In 2026, while laser systems are more automated, these fundamental troubleshooting steps remain vital. Start with a thorough visual inspection of the entire machine.
For unusual noises – grinding, squealing, clunking – focus on the mechanical motion system. Check the X and Y axes for any obstructions that might be impeding the laser head's movement. Look for debris on the rails, tangled cables, or anything that could be catching. Inspect all belts for fraying, looseness, or signs of wear, and ensure they are properly seated on their pulleys. Listen closely to the stepper motors; grinding sounds often indicate a motor struggling or a bearing failure. Worn bearings in the gantry wheels or motor shafts can also produce squealing. A 2026 maintenance guide by Industrial Equipment Care emphasizes preventative lubrication and belt inspection as key to averting 70% of motion-related noise issues.
If the machine fails to initialize or power on, begin with the most basic checks. First, confirm the machine is correctly plugged into a working power outlet. Check all power cords for damage. Next, verify that the emergency stop button is not engaged; this is a common oversight. Ensure the lid or safety interlocks are properly closed, as most modern lasers in 2026 will not initialize if a safety switch is triggered. Check all internal cable connections, especially those leading to the control board, motors, and laser power supply. A loose data or power cable can prevent the system from booting up correctly.
Software and firmware issues can also lead to initialization problems. Try restarting your computer and engraving software. Ensure that your software is updated to the latest 2026 version compatible with your laser. Sometimes, a corrupt firmware flash or driver issue can prevent communication between the computer and the laser. If your machine has a dedicated control panel, check for any error codes displayed, which can provide valuable diagnostic information. Consulting your laser's user manual or manufacturer's online resources (forums, technical support) should be your next step for specific error code interpretations. Often, a factory reset of the control board might be necessary, but this should only be done as a last resort and with proper guidance.
How to Master Your Laser Engraver: My Expert Recommendations for 2026
Navigating the occasional complexities of a laser engraver can seem daunting, but armed with the right knowledge and a systematic approach, every challenge presents an opportunity to deepen your understanding and mastery of the machine. As we look towards the evolving landscape of 2026, where laser technology integrates more advanced features like AI-driven diagnostics and enhanced material recognition, the foundational principles of troubleshooting remain steadfast. My expert recommendation is to embrace a proactive maintenance mindset, rather than reacting only when problems arise.
Start by establishing a routine cleaning schedule for your optics, rails, and exhaust system. Clean lenses and mirrors are the lifeblood of your laser's performance, ensuring maximum power and precision. Lubricated rails and tensioned belts guarantee smooth, accurate movement. An efficient exhaust system not only prevents burn marks but also protects your health and the longevity of your machine. Think of these tasks not as chores, but as investments in consistent, high-quality output.
Beyond physical maintenance, become intimately familiar with your laser's software and material settings. In 2026, software continues to offer more granular control and sophisticated algorithms. Take the time to create and document a library of optimized settings for various materials you commonly use. Experimentation, coupled with careful note-taking, is the most effective way to dial in perfect cuts and engravings. Understand how power, speed, frequency, and air assist interact, and how subtle adjustments can dramatically impact your results.
Furthermore, never underestimate the importance of your workspace environment. A clean, stable environment free from excessive dust, temperature fluctuations, and vibrations is crucial for consistent operation. Ensure your material is always flat and securely clamped to prevent any movement during operation. Lastly, cultivate a habit of critical observation. Unusual noises, smells, or visual cues during operation are often early warnings of developing issues. Addressing these minor concerns promptly can prevent them from escalating into costly repairs or significant downtime. In 2026, the best laser operators aren't just creators; they are skilled diagnosticians and meticulous caretakers of their advanced machinery.
Frequently Asked Questions (FAQ)
How often should I clean my laser engraver's lenses and mirrors?
For optimal performance, clean your laser engraver's lenses and mirrors every 8-20 hours of operation, or more frequently if working with materials that produce significant residue like wood or acrylic. A visual inspection should precede each major project.
The frequency of cleaning laser optics is a critical factor in maintaining output quality and extending the lifespan of expensive components. In 2026, while some advanced systems boast improved dust resistance, regular manual cleaning remains indispensable. The 8-20 hour guideline is a general starting point; however, the actual need depends heavily on the materials you process. Engraving wood, rubber, or acrylic generates substantial smoke and particulate matter that can quickly coat optical surfaces, leading to power loss and fuzzy engravings. Conversely, engraving on anodized aluminum or glass might allow for longer intervals between cleanings.
It’s recommended to conduct a quick visual inspection of the focal lens before each significant engraving job. If you notice any dust, smudges, or discoloration, it’s time to clean. Always use optical-grade cleaning solutions (such as isopropyl alcohol or lens cleaning fluid) and lint-free wipes or swabs specifically designed for optics. Never use abrasive cloths or solvents that could damage delicate coatings. Proper cleaning not only ensures your laser maintains its precise beam and full power but also prevents carbon buildup from becoming etched onto the lens, which can permanently impair its function. Neglecting cleaning can lead to premature replacement of expensive optics.
Can software settings impact my laser's cutting and engraving quality?
Absolutely, software settings profoundly impact your laser's cutting and engraving quality. Parameters like power, speed, frequency (PPI/Hz), line interval (DPI), and air assist control directly dictate the laser's interaction with the material, affecting cut depth, engraving detail, and burn prevention.
In 2026, laser engraving software has evolved into sophisticated control centers, offering an unprecedented level of control over the laser's operation. Every parameter you set directly influences the final output. For cutting, the interplay between power and speed is crucial: too little power or too much speed results in incomplete cuts, while too much power can cause excessive charring or melting. For engraving, the DPI (dots per inch) or line interval determines the resolution and density of the engraved pattern; higher DPI generally means more detail but also takes longer and can cause more heat buildup.
The frequency (or PPI - pulses per inch/Hz) setting for CO2 lasers controls how many times the laser fires per second, impacting the "texture" of the cut or engrave. Higher frequencies often lead to smoother cuts in acrylic, while lower frequencies can create a more pronounced kerf in wood. Air assist control, often integrated into software, allows for precise management of airflow to prevent flare-ups and clear debris. Understanding and mastering these software settings is essential for unlocking your laser's full potential. Many modern software packages in 2026 also include material libraries with recommended starting settings, which serve as excellent baselines for further fine-tuning through experimentation.
What's the best way to test material compatibility for new projects?
The best way to test material compatibility for new laser engraving projects is to perform small, systematic test grids on scrap pieces of the material. Create a matrix varying power and speed settings to observe different outcomes, documenting results thoroughly to establish optimal parameters before committing to a full project.
Approaching new materials without prior testing is a recipe for frustration and wasted resources. In 2026, with an increasing array of innovative materials available, systematic testing is more important than ever. Start by acquiring a small piece of the new material. Design a simple test grid in your engraving software, incorporating varying power and speed settings across different sections. For example, you might create a 5x5 grid where rows represent different power levels (e.g., 20%, 40%, 60%, 80%, 100%) and columns represent different speeds (e.g., 50 mm/s, 100 mm/s, 150 mm/s, 200 mm/s, 250 mm/s).
Label each section of your test grid clearly so you can correlate the settings with the visual results. Engrave or cut this grid, then carefully examine each square for desired depth, crispness, absence of burn marks, and overall quality. Document your findings, noting which combinations produced the best results for cutting, deep engraving, or surface marking. Consider the material's thickness and any coatings it might have, as these will heavily influence optimal settings. This methodical approach allows you to quickly identify safe and effective parameters, saving valuable project materials and preventing costly mistakes. Many laser users also share their optimal material settings online in 2026 forums and communities, providing a useful starting point for your own tests.
Share:
7 Proven Steps to Forge Your Unique Laser Engraving Style & Brand
Slash Laser Engraver Energy Bills by 35%: 5 Smart 2026 Strategies